Radarcape:EMMC Howto: Difference between revisions
imported>Dl4mea |
|||
| (17 intermediate revisions by 3 users not shown) | |||
| Line 1: | Line 1: | ||
{{#seo: | |||
|title=Radarcape eMMC Restore | |||
|titlemode=replace | |||
|keywords=radarcape,emmc,restore | |||
|description=How to restore the Radarcape firmware (Beaglebone black versions, only) | |||
}} | |||
{| | |||
|[[File:Beginner.png|For Beginners]] | |||
|''Required computer skills to execute this task: Intermediate'' | |||
|} | |||
__TOC__ | __TOC__ | ||
| Line 26: | Line 39: | ||
====Radarcape Recovery Image==== | ====Radarcape Recovery Image==== | ||
see [[Radarcape:Recovery|Radarcape Recovery Images]] | |||
==Recovery Process== | ==Recovery Process== | ||
| Line 62: | Line 69: | ||
===Apply power to the unit=== | ===Apply power to the unit=== | ||
It is strongly recommended to have a network connection with a DHCP service connected to the LAN port while performing this procedure.<br>You shall connect the network before applying power. | |||
Replug the power supply. You then should see the blue LEDs in the back flashing. | Replug the power supply. You then should see the blue LEDs in the back flashing. | ||
| Line 67: | Line 76: | ||
The recovery process takes about 1min for the Flightradar24 box and little longer for the Radarcape. | The recovery process takes about 1min for the Flightradar24 box and little longer for the Radarcape. | ||
If successful, the Radarcape/Flightradar24 receiver automatically powers off. All LEDs will be off then. | If successful, the Radarcape/Flightradar24 receiver automatically powers off. All LEDs will be off then. | ||
If it has not powered off automatically, something is wrong with your update process.<br>Eventually you forgot to connect a network cable providing DHCP? | |||
===Remove SD Card=== | ===Remove SD Card=== | ||
| Line 75: | Line 86: | ||
===Reset Boot Switch to eMMC Boot=== | ===Reset Boot Switch to eMMC Boot=== | ||
Reset the boot switch to eMMC boot. | Reset the boot switch to eMMC boot and unplug the power. | ||
[[File:Switch_to_eMMC_boot.jpg|none|thumb|300px]] | [[File:Switch_to_eMMC_boot.jpg|none|thumb|300px]] | ||
| Line 86: | Line 97: | ||
===Finalize Radarcape Recovery=== | ===Finalize Radarcape Recovery=== | ||
For a Radarcape, you addtitionally need to install the latest firmware package as it is shown in [[Radarcape: | '''Note:''' This step can be ommited if you have done a Debian recovery, because Debian images already contain a running version. | ||
For a Radarcape, you addtitionally need to install the latest firmware package as it is shown in [[Radarcape:Software_Features_Major2]]. | |||
Mind that you have just two minutes for the whole process after power on because afterwards the hardware watchdog will trigger a reset. However, nothing can go wrong if this happens, and you anyway know how to to restore the whole Radarcape meanwhile. | Mind that you have just two minutes for the whole process after power on because afterwards the hardware watchdog will trigger a reset. However, nothing can go wrong if this happens, and you anyway know how to to restore the whole Radarcape meanwhile. | ||
| Line 93: | Line 106: | ||
* Connect your Radarcape to the internet and after that to power. | * Connect your Radarcape to the internet and after that to power. | ||
* Wait around 15seconds until the unit is up or simply try to establish a connection | * Wait around 15seconds until the unit is up or simply try to establish a connection | ||
* Use the ssh terminal to open a console terminal to the destination radarcape (eventually you need radarcape.local). | * Use the ssh terminal to open a console terminal to the destination radarcape (eventually you need radarcape.local). For the old Debian 8 based devices, your account name is root and there is no default password. For Debian 10 based devices, the username is jetvision and the password is even so. User jetvision comes with sudo permissions. | ||
* | * It might be useful to update the Linux system to latest state. Login as root to the shell and execute "apt update && apt upgrade -y". | ||
You then will see how the SW installs and afterwards see the front panel LEDS coming back into operation. | You then will see how the SW installs and afterwards see the front panel LEDS coming back into operation. | ||
By the way, this is exactly the process that is performed in our factory. | By the way, this is exactly the process that is performed in our factory. | ||
Latest revision as of 06:47, 15 August 2023

|
Required computer skills to execute this task: Intermediate |
Scope
Beaglebone Black based devices of the Radarcape and FR24 box are working on an internal storage called eMMC while the elder Beaglebone White based units directly work with an SD card. In case of problems the contents of the eMMC can be restored with a recovery SD card. This can be done as often as you like, since the contents of the recovery SD card are not destroyed during the process.
Source of Recovery Data
Recovery Kit
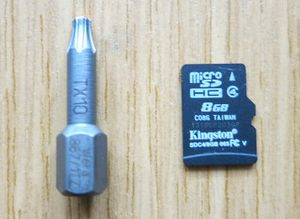
If you have received such one, the recovery kit contains a Torx TX-10 screwdriver bit and a SD card.
Not necessarily the SD card is a 8GB and it will be labeled with the product to restore as well as probably with a version.
On request we can put recovery SD card images to our server so that you can make your own recovery SD card with a SD card writer.
Download SD Card Image
The recovery image can be downloaded from our server and be written to a standard SD card with WinDiskImager.
FR24 Receiver Recovery Image
The FR24 recovery image currently is not stored on the server.
Radarcape Recovery Image
Recovery Process
Unplug the unit from power
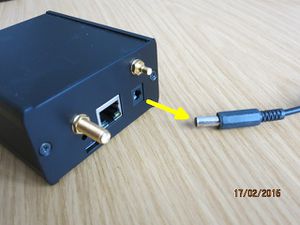
The other cables may be left connected or removed for convenience.
Open the front panel
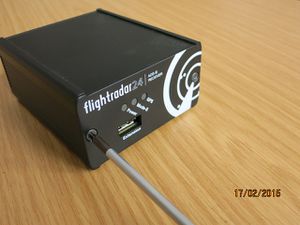
Using a Torx TX10 screwdriver or the torx bit we've delivered open the two front panel screws. Due to machine tightening, it may be hard at the starting point. Don't use a drill and please don't use doubtful screwdriver.
Set Boot Switch to SD Card Boot
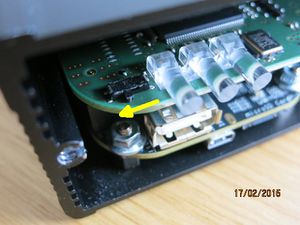
There is a little slide switch on the top board. Shift this to the left hand position.
Insert the SD card
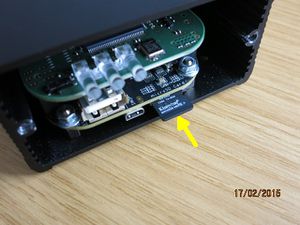
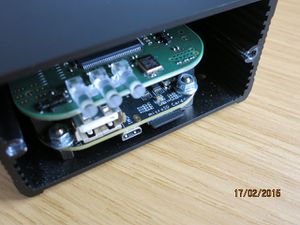
Insert the SD card. The label and text towards the upper side. Push in as far as it locks in the slot.
Apply power to the unit
It is strongly recommended to have a network connection with a DHCP service connected to the LAN port while performing this procedure.
You shall connect the network before applying power.
Replug the power supply. You then should see the blue LEDs in the back flashing.
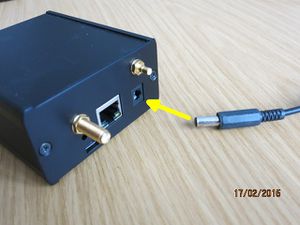
The recovery process takes about 1min for the Flightradar24 box and little longer for the Radarcape. If successful, the Radarcape/Flightradar24 receiver automatically powers off. All LEDs will be off then.
If it has not powered off automatically, something is wrong with your update process.
Eventually you forgot to connect a network cable providing DHCP?
Remove SD Card
Remove the SD card.
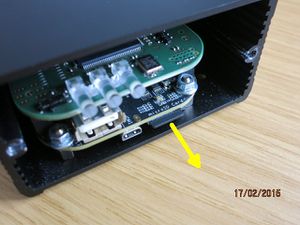
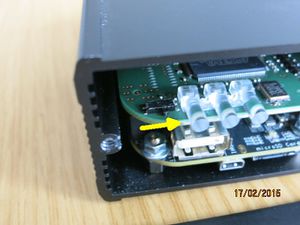
Reset Boot Switch to eMMC Boot
Reset the boot switch to eMMC boot and unplug the power.
Finalisation
Finalize FR24 Recovery
First, plug your unit to the antenna and check that it is working, after you have verified this fix the front panel again and keep the recovery SD card in a safe place so that you can restore the system anytime again.
Finalize Radarcape Recovery
Note: This step can be ommited if you have done a Debian recovery, because Debian images already contain a running version.
For a Radarcape, you addtitionally need to install the latest firmware package as it is shown in Radarcape:Software_Features_Major2.
Mind that you have just two minutes for the whole process after power on because afterwards the hardware watchdog will trigger a reset. However, nothing can go wrong if this happens, and you anyway know how to to restore the whole Radarcape meanwhile.
- Prepare a ssh terminal, e.g. Putty (see other examples here in the Wiki if you need more details how to achieve this)
- Connect your Radarcape to the internet and after that to power.
- Wait around 15seconds until the unit is up or simply try to establish a connection
- Use the ssh terminal to open a console terminal to the destination radarcape (eventually you need radarcape.local). For the old Debian 8 based devices, your account name is root and there is no default password. For Debian 10 based devices, the username is jetvision and the password is even so. User jetvision comes with sudo permissions.
- It might be useful to update the Linux system to latest state. Login as root to the shell and execute "apt update && apt upgrade -y".
You then will see how the SW installs and afterwards see the front panel LEDS coming back into operation.
By the way, this is exactly the process that is performed in our factory.
