Radarcape:Virtual Radar Server: Difference between revisions
Jump to navigation
Jump to search
imported>Beastadmin No edit summary |
imported>Beastadmin No edit summary |
||
| Line 3: | Line 3: | ||
* Download and install [http://www.virtualradarserver.co.uk/ Virtual Radar Server] | * Download and install [http://www.virtualradarserver.co.uk/ Virtual Radar Server] | ||
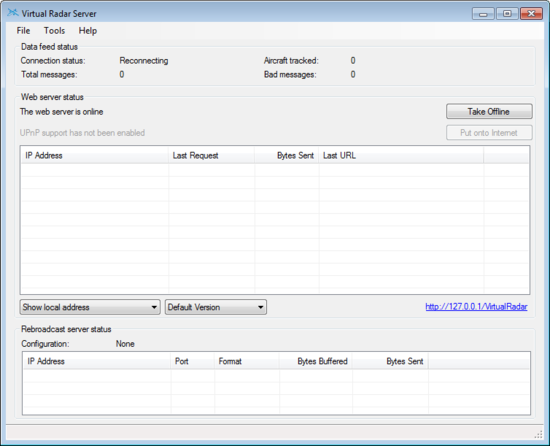
* Start Virtual Radar Server | * Start Virtual Radar Server | ||
[[File:Virtual radar server 1.png|550px|Virtual Radar Server]] | [[File:Virtual radar server 1.png|550px|Virtual Radar Server]] | ||
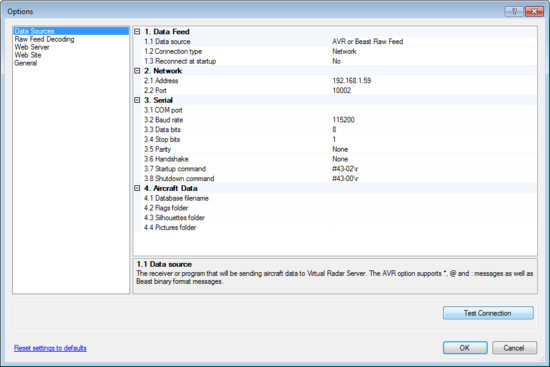
* Goto ''Tools'' => ''Options'' | * Goto ''Tools'' => ''Options'' | ||
| Line 13: | Line 15: | ||
** Test the connection by clicking ''Test Connection'' | ** Test the connection by clicking ''Test Connection'' | ||
** Save settings by clicking ''Ok'' | ** Save settings by clicking ''Ok'' | ||
[[File:Virtual radar server 2.png|550px|Virtual Radar Server - Options]] | [[File:Virtual radar server 2.png|550px|Virtual Radar Server - Options]] | ||
* Click ''Take Online'' | * Click ''Take Online'' | ||
Revision as of 21:04, 4 October 2013
Virtual Radar Server
- Download and install Virtual Radar Server
- Start Virtual Radar Server
- Goto Tools => Options
- Set Data Source to AVR or Beast Raw Feed
- Set Connection Type to Network
- Set Address to your Radarcape IP address
- Set Port to 10002
- Test the connection by clicking Test Connection
- Save settings by clicking Ok
- Click Take Online
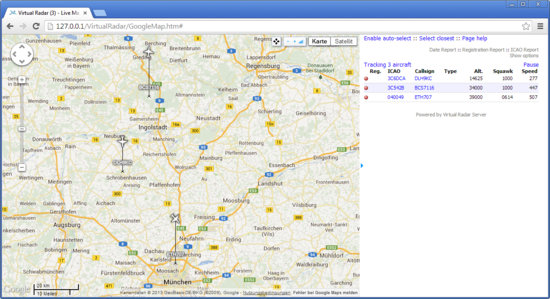
- Open Virtual Radar in your browser by clicking http://127.0.0.1/VirtualRadar in the GUI


