Air!Squitter:Network Connectivity: Difference between revisions
No edit summary |
|||
| Line 1: | Line 1: | ||
=== | ===Airsquitter Network Connectivity=== | ||
====USB Network==== | ====USB Network==== | ||
| Line 5: | Line 5: | ||
[[File:Installation_USB2.jpg|450px|PC via Mini USB]] | [[File:Installation_USB2.jpg|450px|PC via Mini USB]] | ||
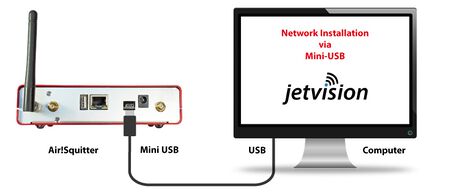
Airsquitter provides USB network connectivity. On Windows 7, Windows 10, IOS and Linux it will install a network adapter. In this mode, Airsquitter is accessible under http://192.168.73.1. | |||
This is the easiest way for users of above operating system to access and configure the | This is the easiest way for users of above operating system to access and configure the Airsquitter. | ||
Note: In order to get the 2D maps, either the host PC must have an internet connection or the | Note: In order to get the 2D maps, either the host PC must have an internet connection or the Airsquitter has to be connected to internet via wired LAN or as a WiFi Client. | ||
====LAN Network Connection==== | ====LAN Network Connection==== | ||
| Line 15: | Line 15: | ||
[[File:Installation_LAN2.jpg|450px|PC via LAN]] | [[File:Installation_LAN2.jpg|450px|PC via LAN]] | ||
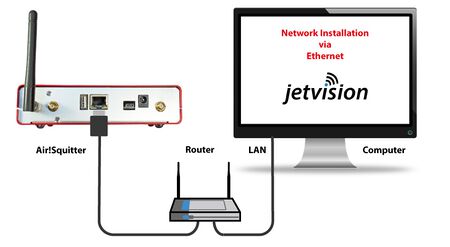
As a regular network device, | As a regular network device, Airsquitter can be connected to a Ethernet LAN. By default it uses DHCP and is accessible under http://air-squitter.local http://air-squitter.fritz.box ('''see above''') or under its IP address, which can be monitored in the OLED screen. Static IP address can be configured in the web configuration menu, too. | ||
====WiFi Client Connection==== | ====WiFi Client Connection==== | ||
| Line 21: | Line 21: | ||
[[File:Installation_WiFi2.jpg|450px|PC via LAN]] | [[File:Installation_WiFi2.jpg|450px|PC via LAN]] | ||
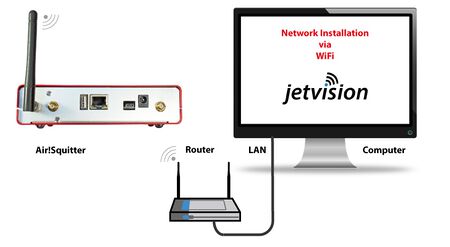
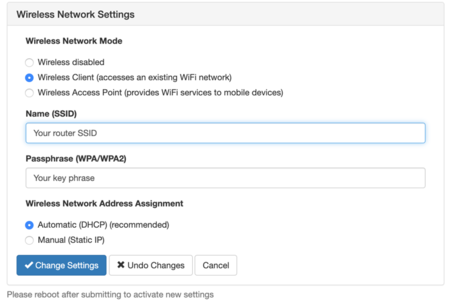
In order to avoid network cables, or wherever a LAN cable is not feasible, | In order to avoid network cables, or wherever a LAN cable is not feasible, Airsquitter is able to connect as a client to a wireless network. The configuration dialogue provides the network SSID and password. Static WiFi IP address is possible, too. | ||
[[File:Config_WiFi.png|450px|PC via Mini USB]] | [[File:Config_WiFi.png|450px|PC via Mini USB]] | ||
Note: In order to get the 2D maps, either the host PC must have an internet connection or the | Note: In order to get the 2D maps, either the host PC must have an internet connection or the Airsquitter has to be connected to internet via wired LAN or as a WiFi Client. | ||
====WiFi Access Point Connection==== | ====WiFi Access Point Connection==== | ||
| Line 31: | Line 31: | ||
[[File:Installation_WiFi_Access2.jpg|450px|PC via LAN]] | [[File:Installation_WiFi_Access2.jpg|450px|PC via LAN]] | ||
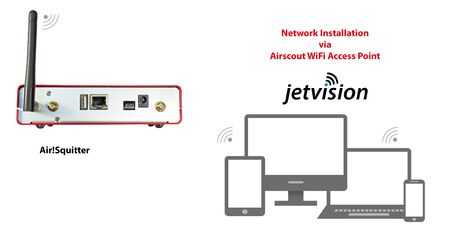
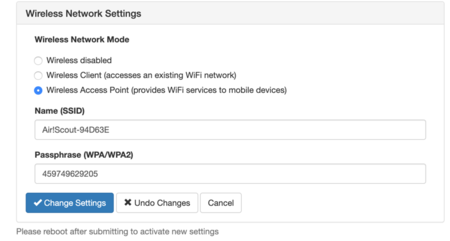
Early versions of the Airsquitter can be configured to work as a WiFi access point. Mobile devices or laptops then can connect to the Airsquitter directly. In this mode, Airsquitter is accessible under http://192.168.73.1. The SSID and password of the network that becomes created can be set up in the configuration dialog. | |||
[[File:Config_WiFi_Access.png|450px|PC via Mini USB]] | [[File:Config_WiFi_Access.png|450px|PC via Mini USB]] | ||
Note: In order to get the 2D maps, either the host PC must have an internet connection or the | Note: In order to get the 2D maps, either the host PC must have an internet connection or the Airsquitter has to be connected to internet via wired LAN or as a WiFi Client. | ||
Latest revision as of 06:52, 22 July 2025
Airsquitter Network Connectivity
USB Network
Airsquitter provides USB network connectivity. On Windows 7, Windows 10, IOS and Linux it will install a network adapter. In this mode, Airsquitter is accessible under http://192.168.73.1.
This is the easiest way for users of above operating system to access and configure the Airsquitter.
Note: In order to get the 2D maps, either the host PC must have an internet connection or the Airsquitter has to be connected to internet via wired LAN or as a WiFi Client.
LAN Network Connection
As a regular network device, Airsquitter can be connected to a Ethernet LAN. By default it uses DHCP and is accessible under http://air-squitter.local http://air-squitter.fritz.box (see above) or under its IP address, which can be monitored in the OLED screen. Static IP address can be configured in the web configuration menu, too.
WiFi Client Connection
In order to avoid network cables, or wherever a LAN cable is not feasible, Airsquitter is able to connect as a client to a wireless network. The configuration dialogue provides the network SSID and password. Static WiFi IP address is possible, too.
Note: In order to get the 2D maps, either the host PC must have an internet connection or the Airsquitter has to be connected to internet via wired LAN or as a WiFi Client.
WiFi Access Point Connection
Early versions of the Airsquitter can be configured to work as a WiFi access point. Mobile devices or laptops then can connect to the Airsquitter directly. In this mode, Airsquitter is accessible under http://192.168.73.1. The SSID and password of the network that becomes created can be set up in the configuration dialog.
Note: In order to get the 2D maps, either the host PC must have an internet connection or the Airsquitter has to be connected to internet via wired LAN or as a WiFi Client.
