Mode-S Beast:Lantronix Xport Edge Software Setup
Note that this setup currently needs to be updated to TCP mode! (All is equal but UDP no longer used as protocol)
Lantronix Device Installer
NOTE: Lantronix Device Installer does not work with Xport Edge
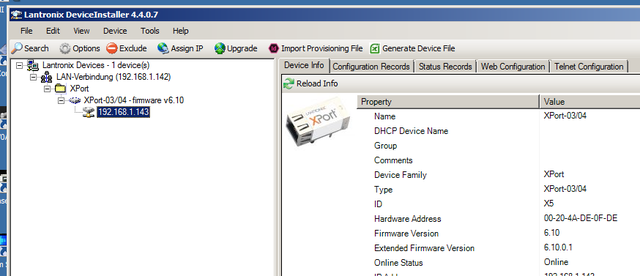
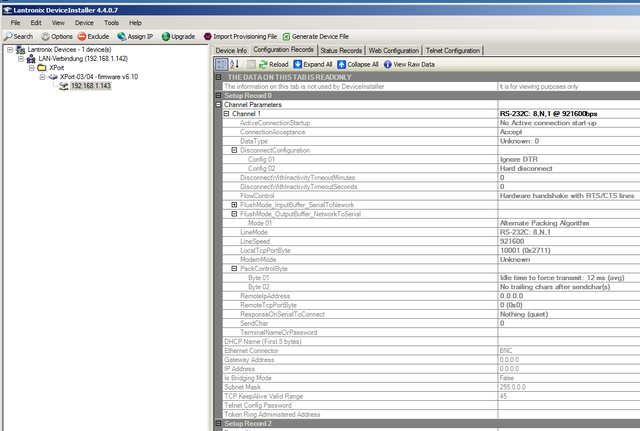
Lantronix Device Installer can be used to discover and check settings of the Xport
Note it might be that with some restricted LAN configuration (for example, NAT mode in a virtual machine running windows), these parameters won't show up completly.
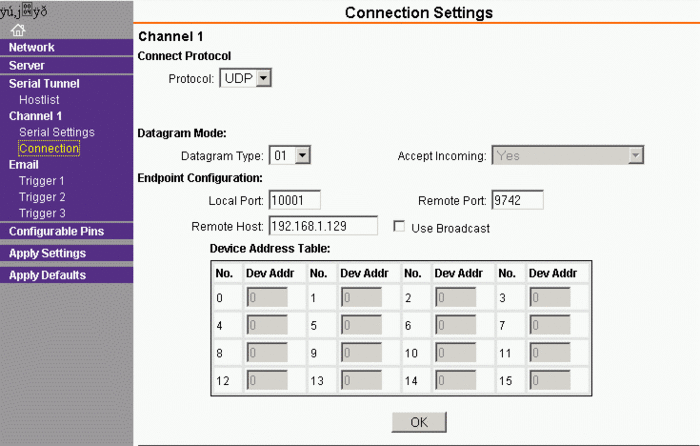
Setting up for UDP mode
This mode is used in order to directly transfer data from the Mode-S Beast over the network to Planeplotter. For Xport use, it is quite essential to use the binary format, so DIP#3 must be ON.
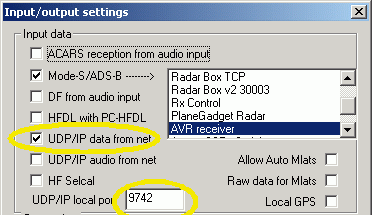
Planeplotter Setup
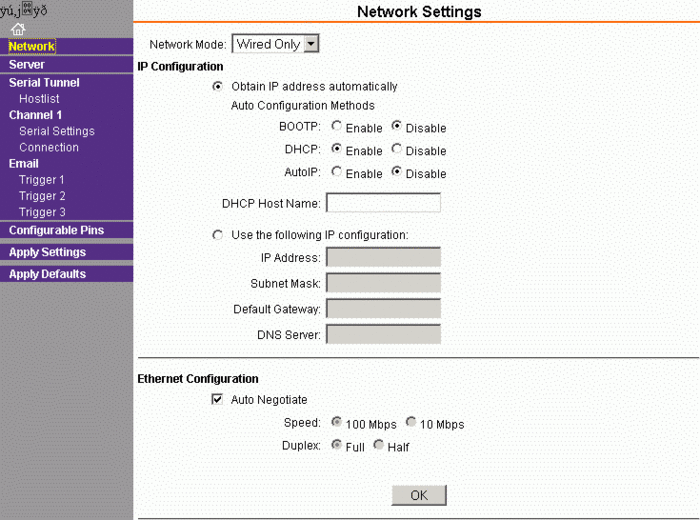
Xport Network Setup
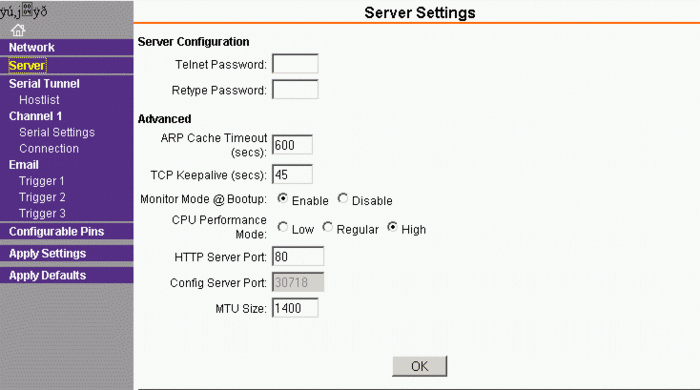
Before doing any other work, you need to set the CPU Performance Mode to High, press OK and then Apply Settings
Xport Network Settings
Important Note: While configuring, you always have to press OK button at the bottom, plus Apply Settings in the left hand menu.
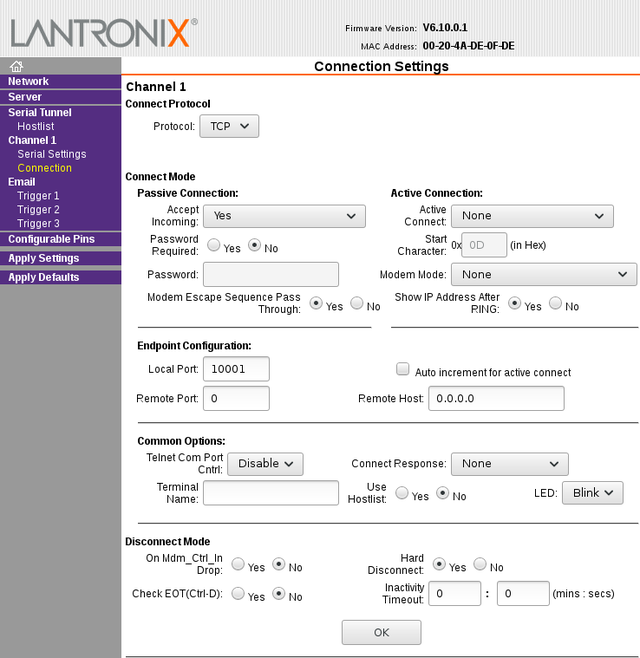
Xport Connection Settings
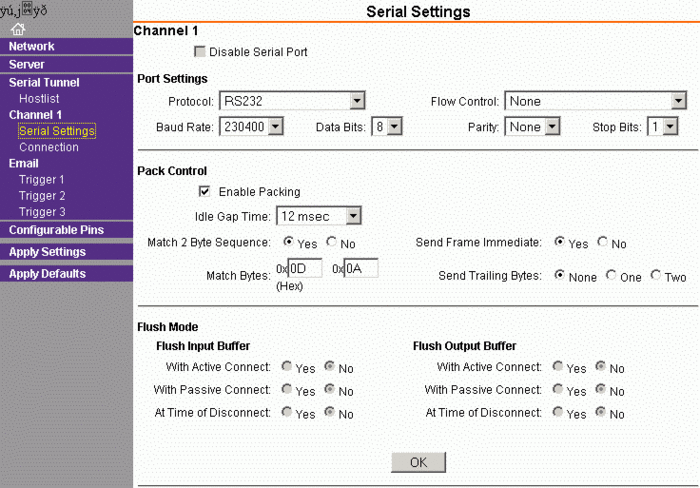
Xport Serial Settings
Mind that here I was using 230400 baud rate, however 921800 is recommended.
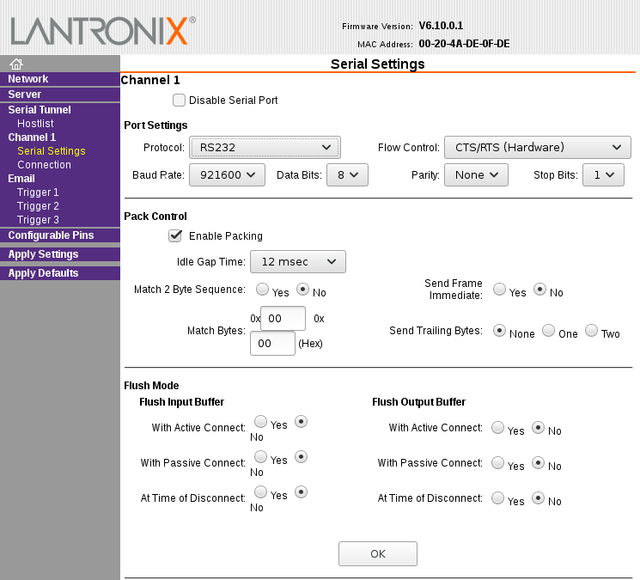
Setting up for TCP mode / COM port over Ethernet
Newer versions of Planeplotter provide a direct TCP interface to the Xport, so data is not just streamed over the network but instead transmitted without loss and only if a device is connected.
Xport TCP Settings Example
You can also interface the TCP to the Lantronix Com Port Redirector, which installs a COM port for the application side.
Additional Hints
- Factory reset without serial:
Telnet to port 9999. Then you get a simple console menue, much like the BIOS setup of your PC. Simply do a factory reset, save and exit, and after a moment you will have it back on factory defaults. - Firmware upgrade of the Lantronix Xport:
There is a FAQ of Lantronix, but ensure that the hardware revision of the Lantronix matches to that.
